
"My Dream Camera"
- Buying a new DSLR (Digital Single Lens Reflex) camera writing reflection assignment due Monday, April 27th at the end of class.
Pretend you are going to buy a new digital camera. Go online to research. Try going to http://www.bhphotovideo.com/
Brands, Camera modes, Types of digital camera (dslr, point and shoot, mirrorless), Must include Cost and Size, and Specifications of different cameras (megapixels, ISO settings, camera modes, flash settings, interchangeable lenses, battery life, shutter lag)
You must provide at least 2 different photo views of the camera in your write-up. (you can't copy and paste to your blog, you have to save the photo from the web and then upload from your computer to your blog.
You must provide at least 2 different photo views of the camera in your write-up. (you can't copy and paste to your blog, you have to save the photo from the web and then upload from your computer to your blog.
Write three full paragraphs-5 sentences each- that's just 15 sentences in all people- stop complaining), on which camera you would choose to purchase based on your research, and why you would choose that particular camera.
Why did you post that brand in particular over other brands?
 Post your synopsis to your blog on your homepage and then notify on Edmodo to your class period for assignment grade. Simply click on "new post" and get to typing. You don't need to put your name or date or anything else, just start typing. The title of your post is "[make and model of camera] camera review".
Why did you post that brand in particular over other brands?
Post your synopsis to your blog on your homepage and then notify on Edmodo to your class period for assignment grade. Simply click on "new post" and get to typing. You don't need to put your name or date or anything else, just start typing. The title of your post is "[make and model of camera] camera review"."Spring Holiday Scene 2015" Photography Assignment Given Out on March 26th and DUE ON Friday, April 10th uploaded to your website on your "Photography" page and notified to your class period on Edmodo.
 |
| Karrie W. 1st period 2014 2015 |
- You will capture at least 7 very unique, very well-thought out photographs and then use Photoshop to create a scene that represents your spring holiday experience.
- Mine to the left here is from our Washington D.C. spring break trip 2013 and I took all photos except the photo of myself which was my wife. I took the images one by one and integrated them together for one dynamic and interesting scene that sums up some of my experiences. Below all the directions/requirements here are some of the example photos I took and used in my collage.
- You might have to have 30 or more photos to choose from when you sit down to create your collage and all of the photos should be taken between these dates: March 27th-April 5th, 2015.
- NO ON-CAMERA FLASH- this means YOU who does it every time even though it always says just here not to use it.
 |
| "Spring Holiday Scene" Kevin H. 5th period 2014-2015 |
- Photoshop Collage Canvas MINIMUM settings: either 10"x 8" or 8" x 10" (this is inches) and with a resolution of 200. (remember, these are minimums)
- Images should blend together as seamlessly as possible so that each image as a part creates one bigger image as the whole.
- You should only have 1 horizon line.
- Remember, this is technically a collage scene, not just a simple collage like the eye collage or outdoor collage. All of your images should seamlessly blend together to create 1 overall interesting scene.


"Single Theme Outside" Photography Assignment given out on DUE ON Tuesday, March 17th
 |
| "You've got Mail" Kevin H. 2014-2015 |
Sometimes it helps to have a theme to keep our mind and interest engaged with our photos. It gives us purpose and a reason to look differently at things that we might have already photographed. Be specific in your theme so that it is obvious that the photo series was taken with particular intent.
A theme might include: color, the same type of flower, classic cars, your hometown, the life of a kid, homeless people, travel photography in a certain location… The list can go on and on. The idea is that your theme is specific but still gives you enough latitude to take interesting photographs.
- Your photos need to obviously display the theme. For example: You’re doing a theme on the color yellow and you photograph a street sign against a lot of blue sky. Or a yellow dandelion found in the green grass at the park. What color did you intend to photograph? Make sure the focal point is clear to the viewer so your photo is a success.
- All photos must be taken outside. (Not in a building or structure or taken from a window looking out.
- You will compile a single-themed collage in Photoshop with at least 15 photos with the resolution of 200 and the dimensions 10"x8", (you may choose portrait or landscape orientation). Remember, in Photoshop, select your photo, "control A", and then go back to your collage document and paste, "control V" and then then resize and reposition, "control T".
- All photo edges must line up with amazing craftsmanship.
- Make sure, VERY IMPORTANT- hold down "Shift" when dragging from a corner to resize. Do not squish or stretch your photos to get them to fit together or you will have -15 big points off! Just throw all your photos in, resize and then crop out the remaining white.
 |
| "Neighborhoods" Daniel K. 3rd 2014-2015 |
 |
| This is the example for doors. Don't do doors for your theme. |
- No on-camera flash. Use you tripod and self-timer in low light situations so your camera can use a slower shutter speed instead of having to use the burned out flash.
- Each photo must have a creative, well thought-out title when you upload it to your website. (-5 points with no title)
- Each blurry photo in your collage will be -6 points off.
- You need to perfectly align your photos in your collage to be neat with good craftsmanship such as the "Doors" example photo above.
< 10 min: Pick your theme and a time you plan on going out with your camera.
~ 1 hour: Photo shoot. Depending on your theme, this might take a little longer or you might have hit the jackpot. Be creative with your photos. Give us a new perspective of something we have probably seen a thousand times.
~ 1 hour: Compile your photos. At least 15 good photos for your series.
Knolling Photography Assignment due February 27 (goes on your "Photography" page on your website for a grade)
Knolling- is a unique way of taking photos of similar objects in a cool manner. The actual definition of knolling is “the process of arranging like objects in parallel or 90 degree angles as a method of organization”.
Kevin D. 5th Period In-Class Knolling 2014-2015 Want to see great student examples from this current 2014-2015 year? Click here and scroll towards the bottom.
Go to this link for a short video on "knolling"(does not work on school computers): https://www.youtube.com/watch?v=s-CTkbHnpNQ
Here are some great examples:
Examples 1: click here
Examples 2: click here
You will turn in 4 photos showing effective "knolling". (Each photo is worth 25 points).
One of the four must be done using the green screen and studio lighting in class.
 Each photograph must have at least different 15 objects that tie in to a theme.
Photos must be taken from straight above as seen in the examples.
You may crop your photos so you don't have distracting matter around the edges that don't go with the subject matter such as walls or doors, etc.
Do not use on-camera flash. (This is why we use your tripod required in course syllabus, and your camera's self-timer).
One of your photo's collection of objects must make up a big shape that goes with the theme of the collect such as this pink background sewing themed Knolling Photo here to the right below:

Most important requirements: You must use your self-timer and a tripod or sit your camera on something creatively so you're not holding the camera to take the photo.
Each photo must have a creative, well thought-out title when you upload it to your website. (-5 points with no title)
-10 points off if there are any over-head shadows in your photos. (the only shadows should be from your objects that are laid out).
Think about the surfaces under your objects. Make sure your surface enhances your photo's theme and does not distract.
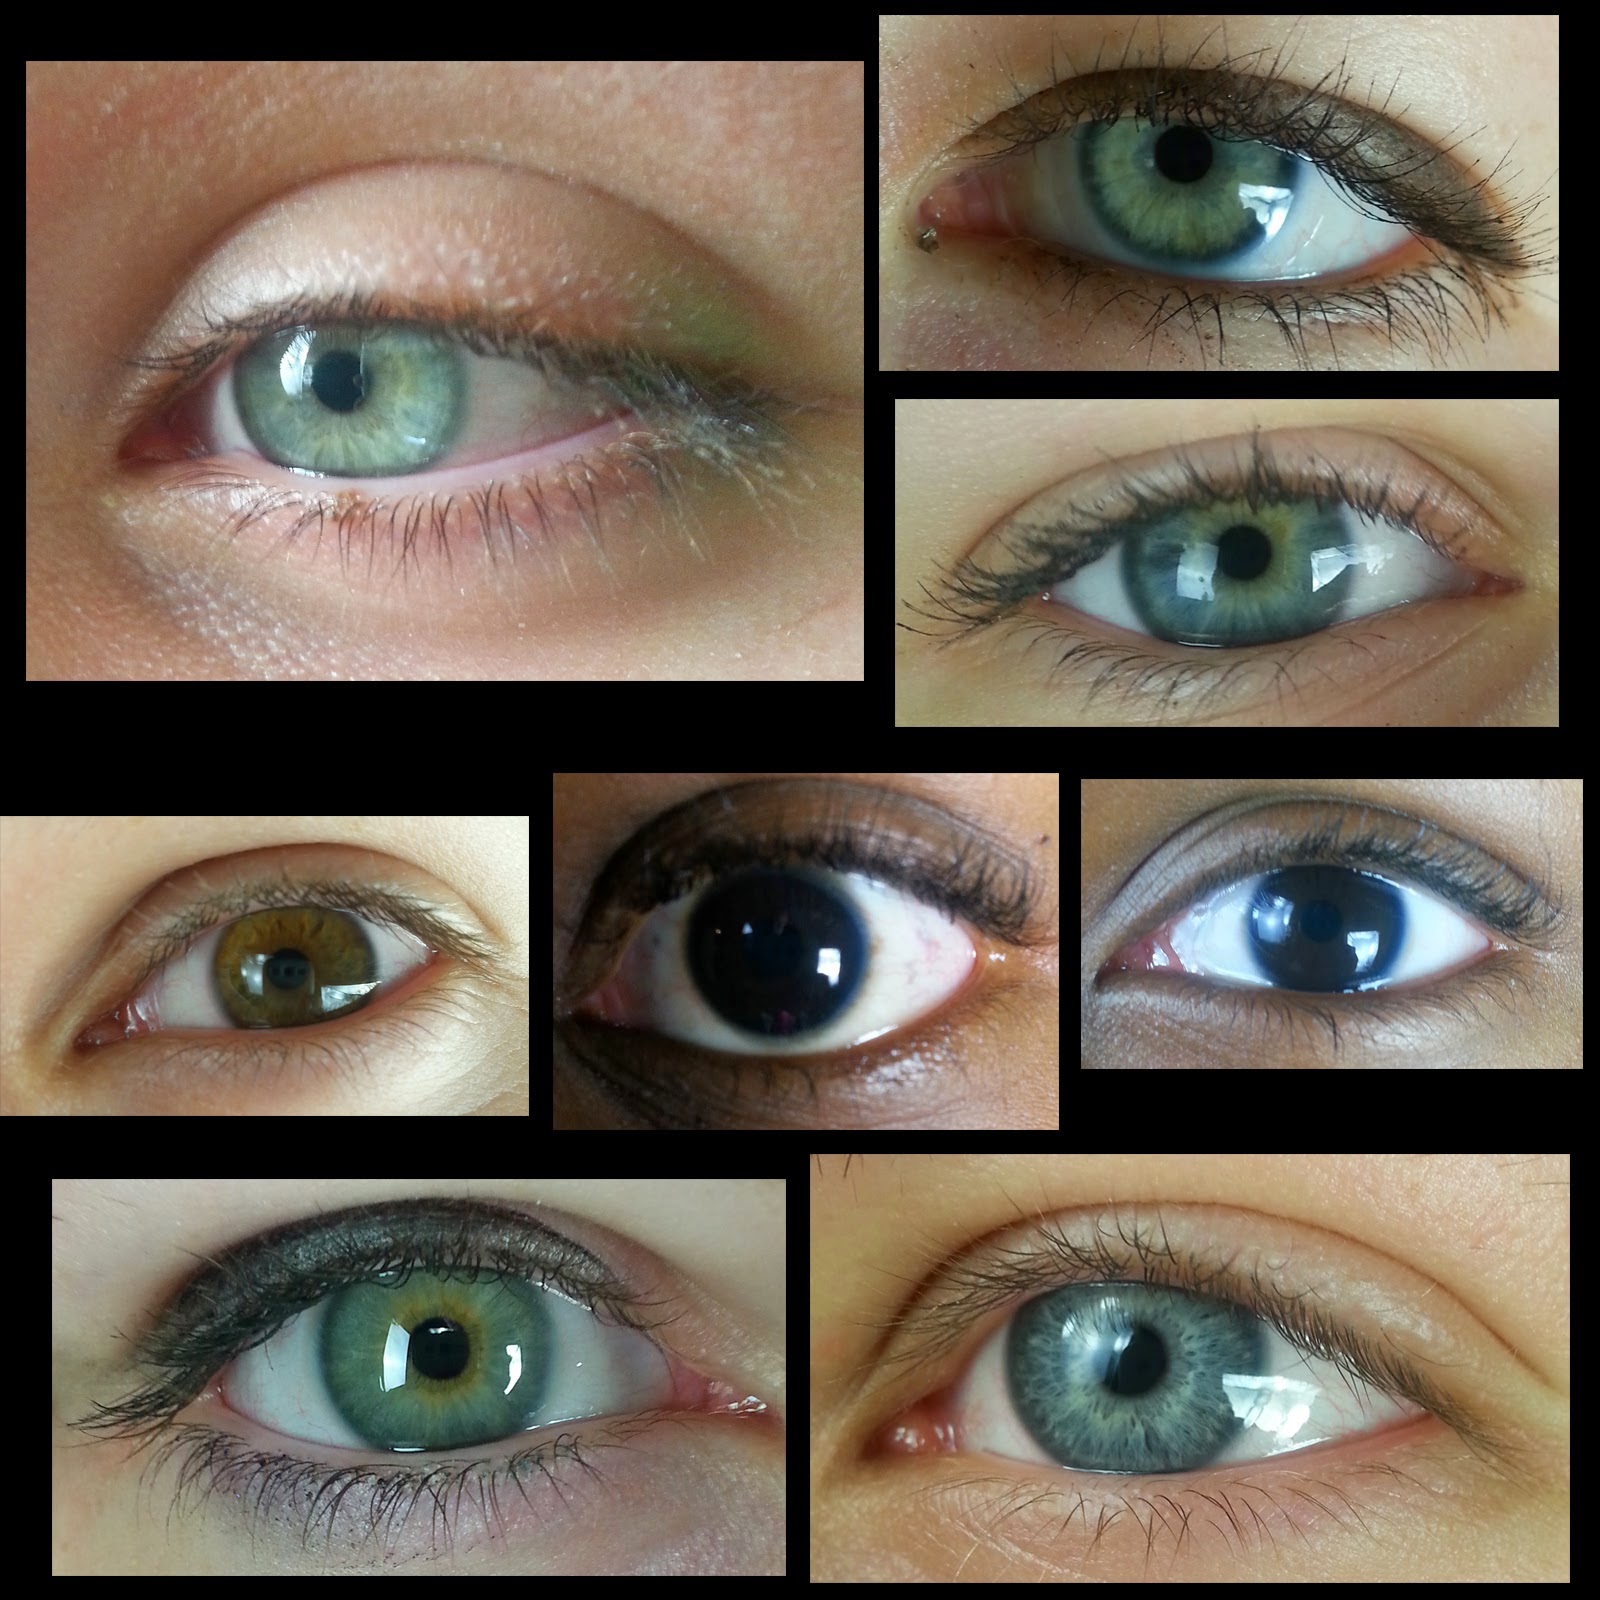 |
| Eye Collage A.J. 3rd Period 2014-2015 |
Eye Collage In-Class Photo Studio Assignment
due Friday, February 6th
You will take at least 8 photos, each from a different person in class and at home.
Out of the 8 photos, 4 of them have to be shot in the photo studio here in class. (You may do all 8 in the photo studio).
The other 4 may be shot out of class if necessary.
Your photos may be in black and white or a combination if you choose.
You may come in before school, during lunch, or after school with someone else as long as you use the photo studio lighting here in D112 for half of the shots.You must use a tripod or set your camera on something for EVERY shot and use your self-portrait.
You will take one self-portrait of your own eye and it will be the first one seen at the top left of your deluxe collage.
You may use animal eyes of your pets for the 4 out of class.No flash! Move the studio light stands around until you have what you want.
NO BLURRY IMAGES! You might have to move your camera on the tripod back and zoom in to get good focus on the eye.
Biggest tip: Use your self-timer with EVERY photo.
 |
| "Refraction" Self-Portrait Gabby S. January 2015 |
- You will turn in 2 photos on your "Photography" page on your blogspot with titles.
- 1 will be a of yourself- Self-Portrait "Selfie"
- 1 will be someone else in class- Portrait
- There are 4 elements to making a deluxe image for this project:
- Specially set up your lighting situation
- Get your camera focused
- Frame your image carefully to compose just your subject matter and nothing else
- Position yourself and the glass to create something original and interesting
 |
| "When you see the Kevins" Malachi J. 5th period January 2015 |
- Must be in "Portrait" orientation, NOT landscape. (So, turn your camera on the side).
- You might have to take 10, 15, 20, or more photos just to get 2 awesome crisp, clear, IN-FOCUS images to show and get the test grade that is this in-class photography assignment.

"Still-Life" Project given out on October 31st and due Friday, November 21st at the end of class with all 5 uploaded to your "Photography" page with meaningful, well thought-out titles.
- Still life photography is the depiction of inanimate subject matter, most typically a small grouping of objects. Still life photography, more so than other types of photography gives the photographer more leeway in the arrangement of design elements within a composition.
- In still life photography, you arrange the scene, choose the background, and can alter the lighting however you want. You should take time with each shot to make it just how you like it. There are plenty of second chances to get the shot right with still life photography.
- The still life photographer makes pictures rather than takes them. Knowing where to look for propping and surfaces also is a required skill.
 |
| "The Distinguished Beautiful Cycle of Life and Death" |
Directions for this project:
- Minimum amount of objects-4
- Maximum amount of object-10
- You must set up a lighting situation with at least 2 light sources (yes, window or sunlight counts as one)
- No blurry photos. You definitely should take the time and take many photos, maybe 10-15 or more for each still-life setup and..... LOOK AT THEM ON THE COMPUTER before you take down that particular still-life setup so if you look at them big and zoomed in on the computer monitor and they're blurry or poor composition/cropping you can reshoot and not lose your still-life configurations.
- NO ON-CAMERA FLASH FOR THIS PROJECT (the photo will not count, -20, if flash was used.
- You must have 5 different locations for each theme/setting/scene photo for each still-life (So if you're in your house, don't take all 5 still-life them in the same place or with the same light, with the same background. The idea is to be as creative as possible and not stagnant.)
- Your backgrounds should be very thought out and not distracting to your still-life subject matter
- Your surfaces of your still-life should really help your objects
- The idea of the project is to come up with 5 very different themes
- NO inappropriate subject matter such as cigarettes and/or alcohol. (Use good judgement and make sure everything is school appropriate).
http://www.district158.org/kduchene/Classroom%20Information%20Files/Photo/Still_Life_Ideas_Sheet%5B1%5D.pdf
- We should be able to get close guessing your theme even without looking at your title which should not be titled by the theme you chose. For the skull example above it is titled "The Distinguished Beautiful Cycle of Life and Death" but the theme is Mortality.
- What should be the proper orientation for your composition? Portrait or Landscape? Your orientation might make or break your overall design of the image.
http://www.creativebloq.com/photography/still-life-photography-1131688
http://www.thephotoargus.com/inspiration/35-superb-examples-of-still-life-photography/
http://www.psdeluxe.com/articles/photography/brilliant-still-life-photography/
 "Letter-Form Photography Assignment" due October 16th uploaded to your "Photography" page on your website with a title for each in quotation (no title is -5)
The best way to strengthen your photography skills is to practice.
Practice causes you to think of new ideas and techniques to use while out photographing.
“The Letter-Form Photo Assignment” is a fun and creative way to help strengthen your camera control, lighting and especially framing/on-camera cropping and to start seeing and thinking with a n.
Requirements:
- You will make the entire alphabet, 26 letters. (Sing the alphabet song if it helps... "...now I sang my ABCs, next time won't you groove with me")
- You will bring in all 26 letters on your SD memory card or flash drive or you can simply upload them to your Google Drive from home.
- I will teach you how to combine all 26 photos into one Photoshop image and then you will upload your "alphabet" image with all 26 letters onto your Photography page to get a grade with a title "Alphabet Letter Form Project"
- Only 6 letters that you shoot may be from nature (such as branches, leaves, water, sky, or other organic shapes)
- You may do any combination of upper and/or lower case letters
- You may do any combination of black and white and/or color images
- You may not take a photo of an actual letter such as seen in this photo from a sign here below and you may not make a letter out of candy, etc. or draw a letter in the sand and then photo it.

NO PHOTOS OF ACTUAL LETTERS
- This project is about Perspective- what can you turn into a letter of the alphabet that everyone else just sees as a.... ?
For examples and ideas, but make it your own people- please, for the sake of art everywhere- MAKE IT YOUR OWN and BE AS ORIGINAL AS POSSIBLE
http://www.alphabetphotography.com/
- EVERY image should be in sharp, clear focus with good composition (don't center your subject matter, it's stagnant) and you should have nice lighting.
- NO ONLY FLASH-LIT IMAGES (-5 points off for photos where on-camera flash is obviously the only light).
- Remember, on-camera flash is meant to be supplemental to the light that is already there, not be the only lighting.
- Be creative with setting up unique lighting situations and remember the best light is sunlight 9 out of 10 times. Either: direct outdoor, or, filtered light through a window
- Never, and I mean never, (trust me, beginners unfortunately do it), never take a photo through a car window or from a moving car.
- NO PHOTOS OF OTHER PHOTOS OR OTHER PEOPLE'S ARTWORK (This means, don't take a photo of a photo/artwork hanging on a wall, or a logo, or a graphic design symbol, etc.)
- -10 points off per image if you have the "date stamp" on your image (go through your camera's menu and TAKE OFF THE DATE STAMP ASAP)
Project Reflection on Notebook Paper to turn in to the "turn in station" by the window with your name, date, class and period and title it "What is Home" photography assignment.
How to make a Alphabet Letter Collage to turn in on "Photography" page to get a grade for project:
- First off, you need to copy all 26 photos from your camera SD memory card or flashdrive or download them from your Google Drive and then paste them on your computer desktop, it's the computer's wallpaper basically.
- Open up Photoshop off the desktop.
- Go to "File" at the top left in the menu bar
- Click on "New"
- Enter the file name as "your name alphabet letter collage"
- Make sure where it says "Preset:" you put "Custom" to do manual settings.
- Enter the size in INCHES 10" Height x 8"width
- Resolution is 200
- Make sure where it says "Color Mode:" it is on "RGB Color" and "32 bit"
- Under "Background Contents" click on "Transparent" so you can see what you're actually doing moving all your letters around later and then click on "Okay"
- This is your portrait orientation canvas for making the collage
- Now, still here in Photoshop, go to "File" again and then click "Open"
- Highlight all your letter photos from the desktop folder to the left of the open dialog box and then click open. This open them all up, it takes a second, as tabs in Photoshop, similar to the internet browser tabs.
- Go to the Letter A photo tab first, (because yes, all letters must be in order)
- First, double-click on the background layer in your layer's palette and unlock the layer so you can edit your letter and then click "okay"
- You may have to flip your letter horizontally or vertically, or rotate it, so go up to the "menu bar" at the top and click on "Edit" and look down where it "Transform"and then click on what you want to do.
- Then you may crop it (get rid of the unnecessary, distracting parts you don't want) by pushing the "C" key and this brings up the cropper tool at your tool bar to the left of the screen.
- Crop your photo as desired and then click "enter" (if you get stuck in "crop" mode simply push the "Esc", escape, key on your keyboard and it will take you back )
- Now, we need to make sure your lighting levels, contrast, and brightness are okay so click "Control L" and this bring up your "Levels" box.
- Drag the left and right triangles back and forth until you get what you like for your photos and then click okay.
- If you would like to change some, not all, of your photos to black and white mode, simply go to the "menu bar" at the top and click on "image" and then "adjustments" and then "black and white", now you can independently change what were the colors into black and white values from darkest to lightest (DO NOT GET CARRIED AWAY- each letter should have black and white and millions of values of gray) when you have what you want click "okay"
- Directions Pause [Remember, when you digitally edit your photos in post the idea is to make it look like they are awesome and like they were never edited in the first place. Like my mom always told my sisters when they were young teenagers, "The trick to putting on make-up girls, is to make it look like you're not wearing any at all"] Directions Unpause
- Now, we need to move your letter over to your collage canvas document tab.
- Click "Control A" for "Select All" so when we copy in the next step Photoshop knows what it is we want to copy.
- Now, "Control C" for copy
- Now, look at all your tabs and look to the right of your tab document bar and you'll see a right pointing double arrow and click it. It will list all open file documents and you'll see your "alphabet collage document" and click on it and you'll simply be back on it now. (That's how you "toggle" between photos and documents, again, just like you would on your internet browser).
- Now we need to add, "paste", the copied letter to your collage by clicking "Control V", which is paste (you think it would be "control p", but that's print).
- It adds the letter at original size but before we transform, change the image size, we need to name the letter in your layer's palette by double-clicking on the letter's layer, it may say "layer 1" if it's the first layer you added, and you then change it to the letter of the photograph and hit enter. (Again, you will have 27 layers counting the background so you need to stay organized or you'll waste time trying to find the letter in the layer's palette area later on.
- Now, time to transform the letter smaller so it fits on your collage. Simply click "Control T" for transform and always drag from the letter's corner while holding "shift" on the keyboard so the letter doesn't get skinny or fat. This is called maintaining aspect ratio or "Constraining Portions" as Photoshop calls it. Then when you have it the size you want, click "Enter" on the keyboard.
- Then you'll need to drag, move, the letter to where you want by clicking on the "move tool", (just push "V" on keyboard to bring it up, it's the top tool on the tool bar on your left).
- Then go to the next letter.
- If you need to change the position , location, of a letter, simply click on the letter layer you want in the layer's palette bottom right and use the move tool, again, "v" on your keyboard
- You should have NO WHITE NEGATIVE SPACE LEFT WHEN YOU ARE DONE . All photos should line up top and bottom and left and right and be in neat rows straight across and up and down.
- To save, first, before you save for your website to get a grade you need to save the original ".psd" file format with all your layers and upload this to your Google Drive.
- You also need to upload every raw alphabet letter to your drive for later on in the year.
- Don't just rely on your flash drive, they get lost, stolen, corrupted, and/or left at home all the time and then you'll have to start all over and have a 0 in the grade book until redone.
- Once you have successfully uploaded your finished ".psd" file format alphabet letter collage to your Google Drive you need then to save it to a ".jpg" file format so you can upload the collage on your "Photography" page on your blogspot so go back to Photoshop with your finished collage open and go to the top menu bar and click "File" then "Save as" and then where it says "file format" pick regular ".jpg" and click "save" and then a "JPEG Options" dialog box will pop up and you need to make sure you slide the bar to "12 Quality" and under "Format Options" you pick "Progress" with 3 scans and then click "Okay".
- Then log back into your Google account and upload the ".jpg" version file to your Google Drive and then upload it to your "Photography" page with a title "My Alphabet Letter Collage"
- Then, copy and paste the link to your "Photography" page where your alphabet collage is and send it to YOUR CLASS PERIOD, not to me.
- Then you're done :)
 |
| This rubric from: http://www.profstark.com/photography-assignment-1.html (click to make larger) |

How
"What is Home?" photo assignment DUE Tuesday, September 16th at the beginning of class ready to present to the class and uploaded and published on your "Photography" page each with a title in quotation marks on your website to get your grade.
You might have to take 40-50 photo (some students take a 100+) it's up to you.
You will turn in 5 deluxe images (upload/publish on your website to turn in).
Your first theme for this project is: "What is Home?"
Merriam-Webster: http://www.merriamwebster.com/dictionary/home
1home
noun \ˈhōm\
: the place (such as a house or apartment) where a person lives
: a family living together in one building, house, etc.
: a place where something normally or naturally lives or is located
1. United States of America
2. South Carolina (or wherever your from and you miss)
3. Summerville, Charleston, Ladson, etc.
4. Your school
5. Your actual house or apartment (whatever building you call your home)
6. Your family (this could include pets)
7. Your bed
8. Homemade food
9. Your favorite places to visit within a day's drives distance from home
10. Anything else that reminds or makes you think of home
(Could be you doing something like chores, or reading, or gaming, cooking, etc., be creative!)
- EVERY image should be in sharp, clear focus with good composition (don't center your subject matter, it's stagnant) and you should have nice lighting.
- NO ONLY FLASH-LIT IMAGES (-5 points off for photos where on-camera flash is obviously the only light).
- Remember, on-camera flash is meant to be supplemental to the light that is already there, not be the only lighting.
- Be creative with setting up unique lighting situations and remember the best light is sunlight 9 out of 10 times. Either: direct outdoor, or, filtered light through a window
- Never, and I mean never, (trust me, beginners unfortunately do it), never take a photo through a car window or from a moving car.
- NO PHOTOS OF OTHER PHOTOS OR OTHER PEOPLE'S ARTWORK (This means, don't take a photo of a photo/artwork hanging on a wall, or a logo, or a graphic design symbol, etc.)
Project Reflection on Notebook Paper to turn in to the "turn in station" by the window with your name, date, class and period and title it "What is Home" photography assignment.
You will answer the below questions for each of your 5 photos:
1. What is the title of the photo and why?(What is the meaning of the photo? Why did you take the photo?)
2. Explain the type of light in the photo. (Be very specific for this one; if you don't know then ask someone but you should know exactly what type of light for every photo) Is it incandescent light, fluorescent light, sun light, reflected light, etc.
3. Why do you like the photo? What would you change about the photo if you took it again?