
http://www.photoshopessentials.com/photo-effects/photo-fill/
You must use your own photos of people's or animals faces, but you do not have to be in the photo..

 "Mutant Humanoid Creature" Photoshop Project due May 8th
You must use your own photos of people's or animals faces, but you do not have to be in the photo..

Canvas Size: 8"x10"; Resolution: 200; background contents: transparent
30 Layers Minimum
In Photoshop, you will create a "Mutant Humanoid Creature" from photographs on the internet and from your own photographs. ONLY PHOTOGRAPHS! This is a creature that resembles a human being but has features from below:
6 layers minimum human features=10 points (your head must be in this!! -10 points off if your head is not in it)
6 layers minimum mechanical features (think robot, car, anything electronic, etc.)= 10 points
6 layers minimum plant features=10 points
6 layers minimum animal features= 10 points
5 layers minimum setting features (setting is the surroundings of where this mutant is and what is going on around him- must have a foreground, middleground, and background like the I-spy project)=10 points
Forgot how to do the foreground, middleground, background all from different photos?
Click here and then go click on the file:
Forgot how to do the foreground, middleground, background all from different photos?
Click here and then go click on the file:
Foreground Middleground Background Tutorial.docx
1 speech bubble layer minimum with school appropriate text of what the mutant is saying or thinking= 10 points
The Creature should be doing something, not just standing there. (Make sure everything in the work is school appropriate= 10 points
Craftsmanship= 10 points
Daily Effort (works bell-to-bell without having to be asked to get busy)= 20 points
 To get grade post to your class period's Edmodo and to your "Digital Art" page on your blogspot website as a ".jpg" file


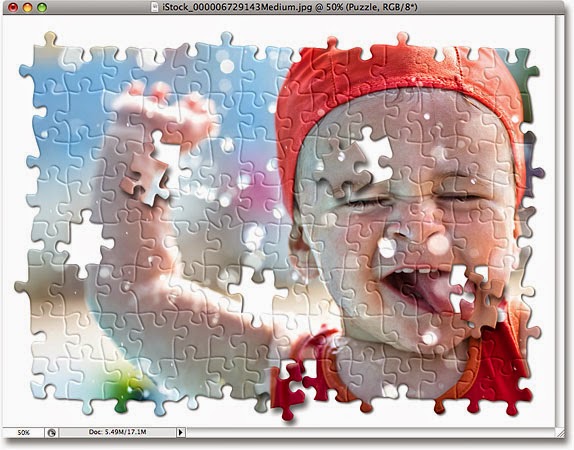
Pick one of the below to do with your own photograph (-10 points if not your photograph) due at the end of class on Thursday, April 23rd.
This will go on your "Digital Art" page on your website and notify your class period with the actual link to the page on Edmodo to get a grade.
- For the puzzle one you must do at least 4 puzzle pieces removed and moved around.
- You must go to Edmodo and get the Puzzle Texture file and save it to your Desktop on your computer when you get to Step 7. (You might have to scroll down in the feed for your class period as it was posted on the 15th).
- Also, we fortunately have a newer version of Photoshop than this tutorial so the "texturize" is under "filter" at the top and then click on "filter gallery".


For the "Fire Portrait":
- You must show the face.
- Photo needs to be from about the waist up.
http://design.tutsplus.com/tutorials/how-to-create-a-flaming-photo-manipulation--psd-1779
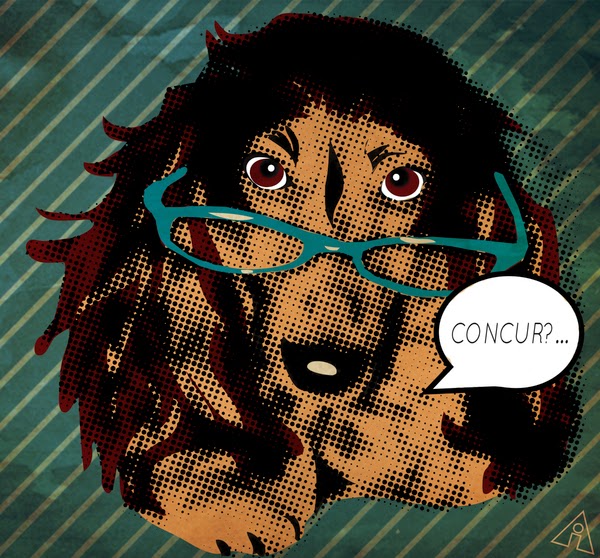
 "Lichtenstein Portrait" Photoshop Project due on Friday, April 17th at the end of class uploaded on your "digital art" page on website and notified to your class period on Edmodo with link where it can be found to get a grade.
Open up a photo that you took of a friend or family member or of yourself in Photoshop. No blurry photos. If you don't know, get it approved by me first.
No need to create a new file or blank canvas. Just use your photo as the canvas and get started with the directions below:
http://www.melissaevans.com/tutorials/pop-art-inspired-by-lichtenstein
- You must have a text speech bubble and/or text box saying something creative or random. (This is signature Lichtenstein even though some of the examples below do not have text speech bubbles and/or boxes).
- You must have a pattern background.
- You must use some line art for and around the main features of the person.
- You must use dots.
- You must use a Variety of Colors.


 |
| Click here to go to the tutorial, the directions |
- First things first, you will need to find one of your own high quality, in super deluxe sharp-focus, very well-lit images to use for this project AND GET IT APPROVED BY ME FIRST. A phone photo might work if it is really good. The photo must be either a person(s) and/or animal(s).
- Photography Class- it MUST be a photo that YOU took-no exceptions- you are in a photography class.
- Media Arts- it is highly recommended that you use a photo you took but you may use an internet found image but it will be minus ten off (-10) off your grade and it is a test grade.
- As seen in the example of the snow boys above, your photo must show your subject matter, your person(s) and/or animal(s) touching, sitting, or standing on the ground or floor in order for the 3-d pop effect to work. This is why you MUST get it approved by me first.
- Second, you will need to click here and it will take you to school fusion. Scroll down and click on the file that is named after this project. It is a Word document.
- You must follow the directions very carefully reading the entire step and then doing each step in Photoshop on your image before moving on to the next step.
"Blogspot Website Background"
You will choose a photo YOU TOOK or one of YOUR artworks to be the background wallpaper on your live blogspot website.
It should be something that is very clear and in-focus and should be very artistic and original and show off your style and effort.
First, choose a background that will look good behind all your tabs and pages and blogspot website content and then open it up in Photoshop- "File" and then click on "Open"
Then you need to click on "Image" at the top menu bar and then click on "Image Size".
The pixel dimensions need to be 1800 wide or under. Which means, that if you change your width from say 3200 wide to 1800 wide it will constrain the proportions of your document so it doesn't get skinny or fat and it will make the height around 1200. Just change the width and let Photoshop figure out what height it needs to be by automatically constraining the proportions for you.

Make sure when you are in your "Image Size" dialog box that the "constrain proportions" box is checked as seen here to the right:
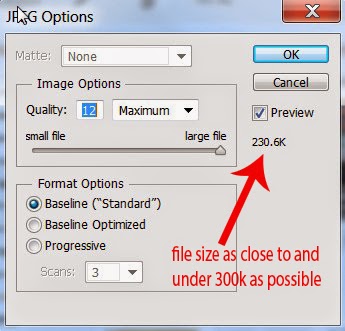 Now, to make sure it is no larger than 300k which is 300,000 bites as it says in blogger or it will not allow it:
Go to "File" and then "Save As" and make sure it is on normal JPEG or .jpg and change the file name to something else and then click on "Save".
Now, after you save the "JPEG OPTIONS" dialog box will appear and you have to make sure you click and drag that up facing triangle for the quality until it's just under 300k and then click "Okay".
 Now you are ready to upload your image in your blogger editor.
You will have to be logged into your blogger editor.
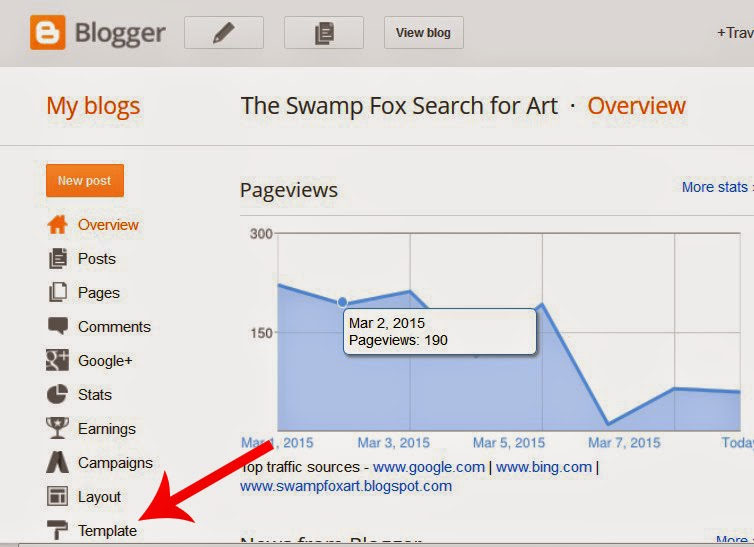
Notice at the left as seen here you will seen the "Template" tab. Click it.


As seen here to the right, you will then click on "Background"


As seen here to the right, now click where it says,
"Upload Image" and then click "Browse" on the next screen to find your image on the computer.

As seen to the right you can click on "alignment" and change the position of your background.

So, click on the "Picture Window" template.

Also, as seen here directly to the right, you might have to adjust your blog and/or sidebar widths so your background photo/artwork will show more on your site.

Now you are probably going to have to change the text size and color of your pages, etc. so we can see your pages. So click on "Advanced" and change the settings.
 As seen here to the right, when you get it looking awesome, you will then need to click on "Apply to Blog" to save your settings.
"Movie Poster Project" due completely done by Friday, March 13th at the end of class uploaded on your "Digital Art" page. (Project given out on Wednesday, February 25th).
You will create a fictitious movie poster.
Meaning, no prequels or sequels or parodies (no movies that have ever been done before or part 2s or 3s, etc.
 |
| Samantha J. photo 1 2013-2014 |
The idea is to make a fake movie poster that looks as real as possible and still be very original and creative.
Requirements:
- Canvas Size: 8"w x 12h" ("s means inches, w=width; h=height) with a resolution of 200. Make sure it is in "RGB" color mode, not grayscale) Change the "background contents" to "transparent" to make it easier to stay organized.

- Photography students must have a minimum of 30 named and numbered layers (-1 points off for each unnamed and/or unnumbered) because photo student must have at least 5 layers from your own photos) Photo students MAY NOT do the media arts requirements. You must use 5 layer images from YOUR photos... it's photography class people.
- Media Arts Students must have a minimum of 40 named and numbered layers (-1 points off for each unnamed and/or unnumbered).
- All students: you may ONLY use photos for this project just like the I-Spy project. (No edited photos either, no cartoon characters, no CGI- Computer Generated Images such as from video games, etc.; if you can't tell if it's a photo or not DON'T USE IT!)
- Must have a foreground, middle ground, and a background that work well together, no straight edges where they meet. Click here to go to the "fg mg bg tutorial" which is under the "files" section. It is a Word document and you just follow along step-by-step.
- Must have at least 5 text layers each with a DIFFERENT font. (Yes, the text layers count towards the total number). To add text, simply hit the "t" on the keyboard and click where you want to add the text. If the text isn't showing up either change its color or drag the text layer to the top of your layer's pallet. (Notice all of the text options at the top under the menu bar).
- Must have a release date
- The name of the movie must be big and have creative layer styles and blending options (simply click on the text layer in the blue and layer styles will pop up- play around and make it look awesome)
- Must have a text movie slogan (Look at the example above for Must have at least a foreground and a background that work well together, no straight edges where they meet. (I suggest you have a middle ground to add more depth like in your I-spy project but you don't have to have a middleground)., it's slogan is "See what happens when the Zaxbys come out to play"
- Must have 2 logos created from scratch, totally original. (One for the movie studio and one for the movie production company. It might take 2 to 4+ layers to create each logo.
- Must have movie rating box.
(Just copy and paste this from the internet). - Must have who directed the movie (Directed by ?)
- You must be in your movie
- No guns or any deadly weapons, use a nerf or water gun instead; no drug references, etc. ; keep it school appropriate (anything you couldn't have out at school doesn't belong in this project people) BE CREATIVE and a PROBLEM SOLVER
- Zoom In/Zoom Out "Control +" and "Control -)
- Undo last action "Control Z" or undo several actions "Control Alt Z"
- To select all "Control A"
- To Copy "Control C"
- To Paste "Copy V"
- To resize, rotate, skew "Control T" (free transform)
- To deselect, to undo a selection "Control D"
- To add to a selection hold down "shift" and you will notice the "+" sign next to your selection tool.
- To subtract from a selection down "alt" and you will notice the "-" sign next to your selection tool.
- Selection tools, you are going to use them throughout the ENTIRE project.
- "M" on your keyboard brings up the Marquee selection tools on your keyboard
- "L" on your keyboard brings up the Lasso selection tools on your keyboard
- "W" brings up the magic wand selection and under it is the quick selection tool
- Just remember, for every different situation might call for a different selection tool or for you to use a combination of the selection tools to get the job done.
- Think about it like this, copy and paste your image into Photoshop, Photoshop places the image on it's own new layer for you, then simply resize it, again "Control T" for transform, and then select what you DON'T want and hit "Delete" on your keyboard. You are then left with what you do want. Use the move tool, the top tool on the tool bar, to drag it around. You might have to resize it again.
- Save "Control S" (make sure you are constantly saving after so many layers. Half way through class I would upload my in-progress project to Google Drive and then again at the end of class. YOU DON'T WANT TO LOSE ANY WORK... EVER!)
- I AM NOT GOING TO WRITE YOU A PASS BECAUSE YOU DIDN'T SAVE THROUGHOUT CLASS AND IT'S TAKING FOREVER TO SAVE- save as you go.
 |
| Brittany B. 8th period 2014-2015 |
"I-spy Project" due January 23rd (think about Where's Waldo, except YOU are Waldo and you won't use other people's artwork such as cartoons, etc. ONLY UNEDITED PHOTOGRAPHS!
You must use the green screen and bring in YOUR camera or phone to take a photo of yourself; you may get someone to take a photo of you)
1. Open up Photoshop and create a new document, "File" then "New", with the size of 8 inches high x 10 inches wide, yes this project will be in "landscape" orientation, and with a resolution of 200. Make sure you change the pixels to inches if it's not already on inches. (You may pick either landscape or portrait orientation, it's up to you). Change the background contents to "transparent"
2. You will first come up with a theme for your overall composition. "Magic, sports, movies, space, school, technology, fashion, hunger, poverty, war (no guns or violence though), etc. etc.
3. Then, again, only using photograph images, you will create a foreground, middleground, background (you must have at least three but may have more) taking each "ground" from different photographs and layering them together, but each on its own layer.
The idea with the grounds is to make them look like they go together well when they really don't because they are from totally different photographs.
4.
Now, the fun part begins.
- Photography students: You will have have 50 total layers in your layers palette, yes, I'll be checking for sure.
 |
| I-Spy Amy W. 8th period Media Arts |
- Your foreground, middleground, background will count as 3 of the 50. (Name their layers as well).
- You will have 50 items from DIFFERENT PHOTOGRAPHS that relate and go with your theme (again, I can't remind you enough: PHOTOGRAPHS ONLY- you will have BIG points off if you don't use PHOTOGRAPHS ONLY- NO CARTOON CHARACTERS, unless they are photographs of people wearing cartoon costumes).
- Photo students MUST have at least 15 layers from photographs that YOU took. (Now, this means you must take a selection from each photo, an item, not the whole photo)
- Media Arts students: same as Photography, EXCEPT, you must have 65 layer selections but you can get all your photographs from the internet. If you want to do the Photography requirements and use 15 selections from your own photographs this is fine and you will then only have to do 50 layers.
IMPORTANT: Make sure when you search in GOOGLE IMAGES, that you click on "search tools" (below the search bar where you type) and then "size" and then "large" You must get large, good quality images or your project will look junky and when you resize your layer selections using "Control T" it will get distorted and pixelated.
 |
| "Life is Good" A.J.aka "Johnny Bravo 3rd period I-spy project 2014-2015 |
As soon as you paste it Photoshop will put your new layer selection image on its own new layer for you.
 |
| Dylan A. 5th period January 2015 |
Important Photoshop Command and methods for this specific project (more to be added as I think about what might help you more) :
Zoom In/Zoom Out "Control +" and "Control -)
Undo last action "Control Z" or undo several actions "Control Alt Z"
To select all "Control A"
To Copy "Control C"
To Paste "Copy V"
To resize, rotate, skew "Control T" (free transform); hold down "shift" to maintain proportions as you drag from a corner.
To deselect, to undo a selection "Control D"
To add to a selection hold down "shift" and you will notice the "+" sign next to your selection tool.
To subtract from a selection down "alt" and you will notice the "-" sign next to your selection tool.
Selection tools, you are going to use them throughout the ENTIRE project.
"M" on your keyboard brings up the Marquee selection tools on your keyboard
"L" on your keyboard brings up the Lasso selection tools on your keyboard
"W" brings up the magic wand selection and under it is the quick selection tool
Just remember, for every different situation might call for a different selection tool or for you to use a combination of the selection tools to get the job done.
Think about it like this, copy and paste your image into Photoshop, Photoshop places the image on it's own new layer for you, then simply resize it, again "Control T" for transform, and then select what you DON'T want and hit "Delete" on your keyboard. You are then left with what you do want. Use the move tool, the top tool on the tool bar, to drag it around. You might have to resize it again.
Save "Control S" (make sure you are constantly saving after so many layers. Half way through class I would upload my in-progress project to Google Drive and then again at the end of class. YOU DON'T WANT TO LOSE ANY WORK... EVER!)
I AM NOT GOING TO WRITE YOU A PASS BECAUSE YOU DIDN'T SAVE THROUGHOUT CLASS AND IT'S TAKING FOREVER TO SAVE
"Super Deluxe Cubism Self-Portrait Photoshop" project
 |
| Vicki 7th period 2014-2015 |
After you open the directions up and look through them you will need a photo of you from the shoulders and/or neck up.

Now in Photoshop, you will create a new document to work on as always:
"File" and then "New" and then type in these settings:
Where it says "Name" type in: Your name cubism self portrait
10 inches high (not pixels)
Resolution of 200
change the background contents to "transparent"
Then click "okay"
 |
| Tiffany D. 5th period 2014-2015 |
Otherwise, you will be to open a different photo of yourself in Photoshop: "File" and then "Open" and pick your photo.
Once open click "Control A" for select all; notice the entire photo is selected.
Now, click "Control C" for copy
Now go back to your cubism document tab and click "Control V" for paste
Now, since you only need from your neck up, use a selection tool and select the portrait of you.
Use "Control T" to make your image take up the space from left to right and drag your portrait down to the very bottom.
Now, you probably have some empty space at the top.
Push the "C" on the keyboard to crop your entire document so as to get rid of the top unneeded space.
To crop simply click and drag over the part of your portrait you want to keep and then push "enter" on the keyboard when done.
Now use "Control S", this is save.
 |
| Kayla A. 5th period 2014-2015 |
Now it is time to open actual directions for the project:
Go to this link and click on the name of the project .pdf file to pull up the directions: click here
"Photography Drawing Project" In-Class Only

2nd Step: We will use National Geographic magazines only so the quality of the photographs are high quality.
Search through the many magazines to find one that you believe you can add some really interesting subject matter to the already existing image. GO CRAZY LIKE YEAH!
2.5 Step: Must be a FULL PAGE WITH NO TEXT.
3rd Step: Get your photograph approved by me and tell me your first ideas to getting started. Yes, you might have to change it as you go but at least I know you know how to get it going like yeah!
4th Step: CAREFULLY tear it out of the magazine while not damaging the photo or the magazine.
5th Step: Get out your sketchbook or a piece of drawing paper and draw a 5"x5" square using a ruler, it doesn't have to be perfect as it's just the minimum size used as a guide to show you not to go smaller when designing your shape..As long as the shape you are drawing on is bigger than the 5"x5" it can be any shape you want, geometric or organic. DO NOT USE A BORING SHAPE LIKE A SQUARE OR RECTANGLE. Your shape should fit it creatively in your photos space. (Look below at Step 8- do not cut out your drawing shape yet)
6th Step: Draw. You must draw some of the already existing photo into your drawing so it looks like what you're adding now belongs in with the photo. NO CARTOON CHARACTERS. Only draw from photos for reference. Do not draw from someone else's drawings/artwork.
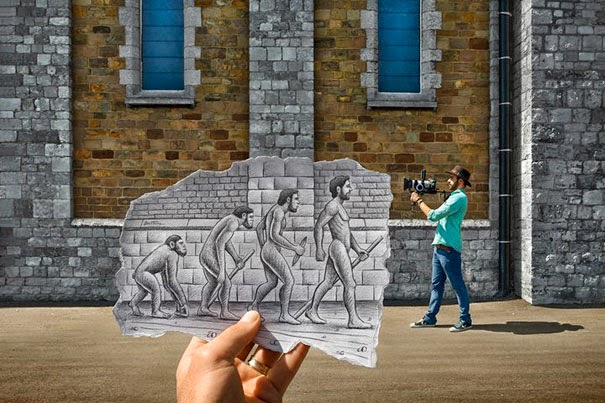 7th Step: When class is over, make sure you safely keep your photo and your drawing paper in your binder that stays in class. If you take it with you and forget it or lose it, YOU WILL START OVER THE NEXT DAY.
8th Step: When you complete your drawing and it is approved by me you will cut out the drawing in a shape that fits in with your photo
9th Step: then you will take a photo of you holding your drawing over the original photo on the easel at the green screen with good lighting, (no reflections on the photo. Remember, the idea is to make it look like you are standing in the photo holding up a drawing on paper).
10th Step: Upload the photo on your "My Artwork" page and title it something creative in quotation marks.
11th Step: Go on Edmodo and paste the link to your class period's group so I know you are ready for me to grade it and I know where to go to find your work.

http://www.google.com/search?q=photography+drawing&safe=active&client=firefox-a&hs=7hT&rls=org.mozilla:en-US:official&channel=sb&source=lnms&tbm=isch&sa=X&ei=BPVcVI34CuLdsATLmYDIAQ&ved=0CAgQ_AUoAQ&biw=1128&bih=672&dpr=0.9&surl=1#facrc=_&imgdii=_&imgrc=REuzK6achM_UMM%253A%3BbO9IIHPtDM5a7M%3Bhttp%253A%252F%252Fwww.topdesignmag.com%252Fwp-content%252Fuploads%252F2011%252F05%252Fpencil10.jpg%3Bhttp%253A%252F%252Fwww.topdesignmag.com%252Fdrawing-vs-photography-part-ii%252F%3B600%3B612
"Musical Instrument Photoshop" Project
 |
| "Harmony" Brittany 8th period |
 |
| "The Beast and his Music" Tyler L. 1st period |
http://photography-1-3a-d.ashleyridge.schoolfusion.us/modules/groups/integrated_home.phtml?gid=4517380&msg_notify=File+uploaded.&sessionid=376a25cbb36d1d610feb0b95408e195a
"Animal Zentangle" project due Tuesday, October 21th at the beginning of class uploaded to your "Artwork" page and then paste the link to said page to your class period's Edmodo to get a grade. If you use class time wisely you will have over 5 hours to do this project this week.

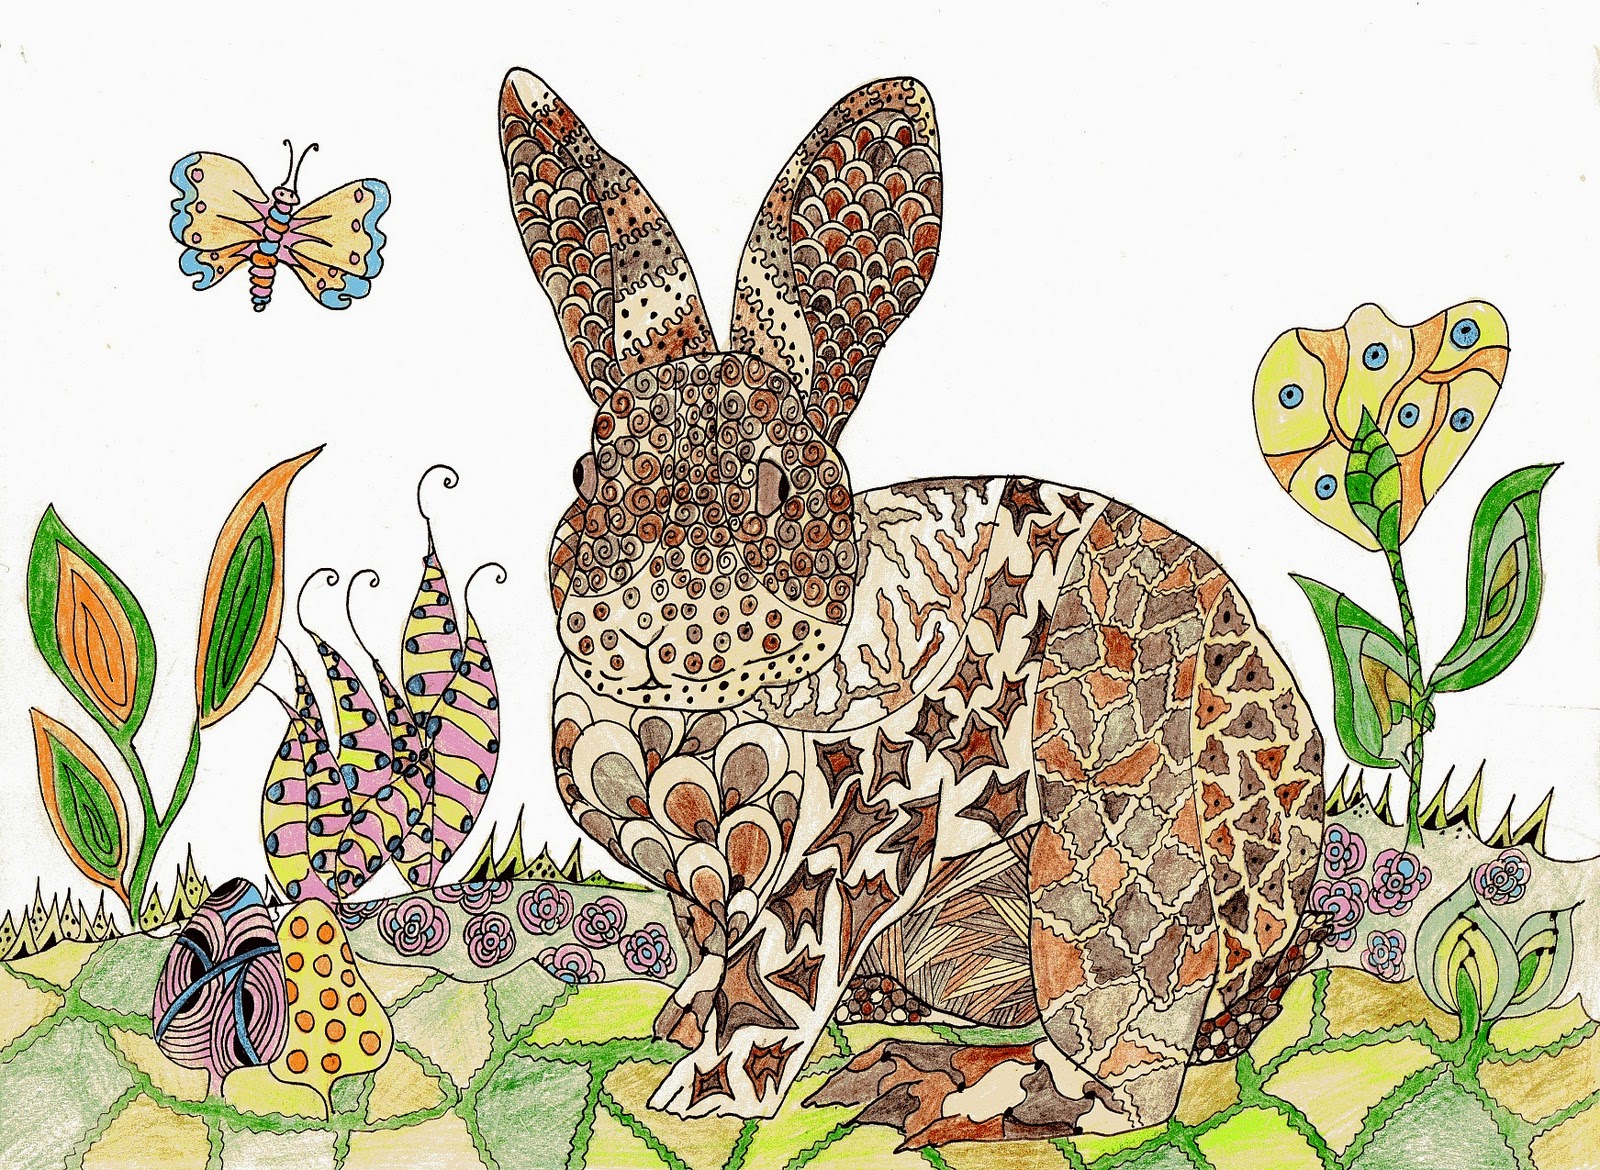
- First, pick a PHOTOGRAPH of an animal (do not draw from someone else's artwork- no cartoons, etc.) to draw for your project we are starting today (it can be the face really big, or the entire animal. You MUST take up at least 64.45 percent of the page with your subject matter. That means that you can only have 72.788 square inches of negative space around your subject matter. Duh!
- No mythical, unreal creatures. Only real animals.
- Second, when you have picked your animal, go to my podium and sign up your animal with your name so no one else in your class period may do the same one.
- Third, you will use 18"x12" paper (found on the turn-in-station table) You may choose to do your project in landscape or portrait orientation. What's best just depends on the photograph you are drawing from.
- No drawing from silhouette photos such as: http://shardsofsilence.files.wordpress.com/2014/01/wolf-howl-silhouette1.jpg
- Then, draw the basic contour lines that make up the animal. Not just the outlines, do the eyes, and whatever features inside the animal that make up that animal.
- Fifth, start to divide the inside of the entire animal into large organic or geometric shapes so you can start to tangle a Variety of patters throughout
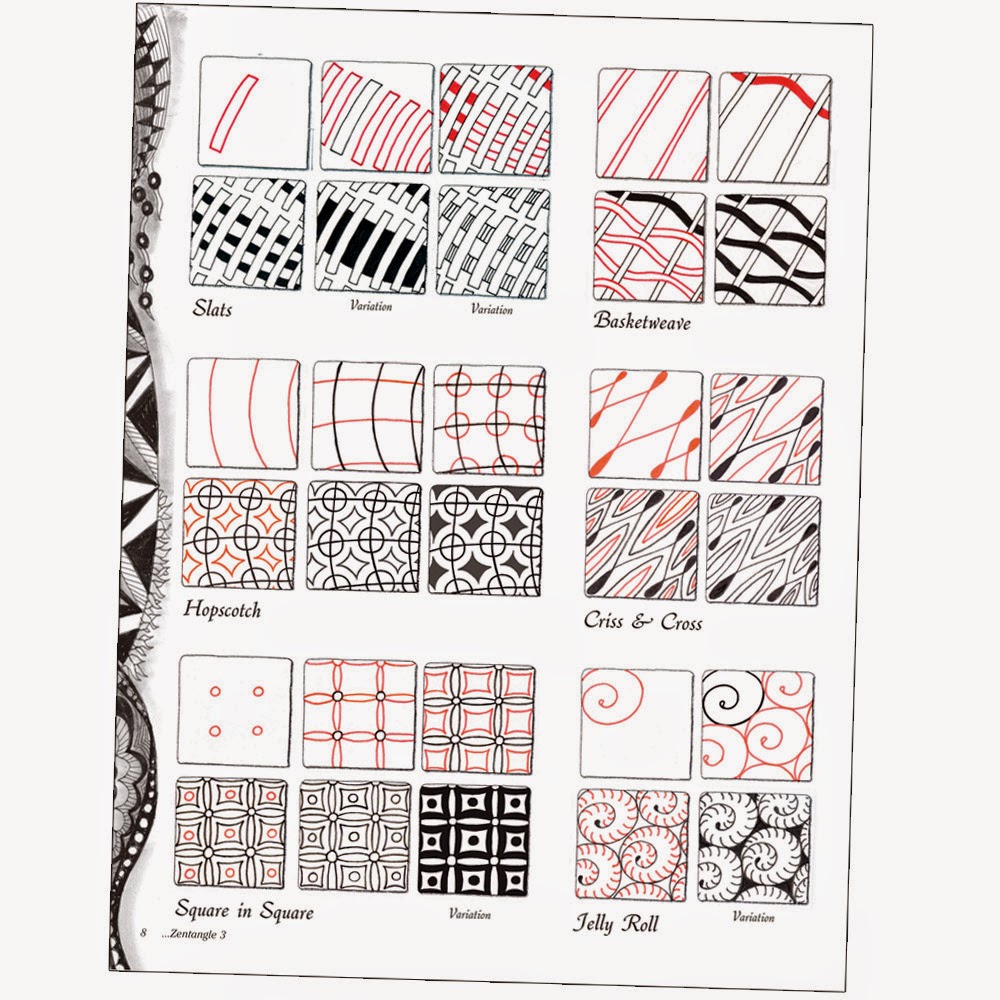
- Google "Zentangle Patterns" for ideas. At home you could search on Youtube for videos on Zentangle. We will watch some videos in class, but you will hopefully want to be different from everyone else.
- After you have tangled the entire animal and at least 1/2 the background you must use at least TWO (2) different colored mediums to add a good range of colored-values to at least 75 percent of the overall page. Such as the bunny rabbit above.
- Colored Mediums choices:
Water Color
Markers
Drawing Chalk
Oil Pastels
"Surreal Landscape Salvador Dali-Inspired Collage" due Tuesday Oct. 7th end of class uploaded to your "artwork" page for grade
http://www.biography.com/people/salvador-dal%C3%AD-40389
 |
| "Persistence of Memory" Salvador Dali 1931 |
- Step 1: Start by finding one or more reference photos that you can combine in your drawing to make a imaginative and creative landscape that makes people think (thought provoking)
- So, you are basically combining 2 or more photos you find on the internet, photographs only, to make one fun and interesting landscape scene collage using cut-out colored values from magazines.
- You need to have something going on that's interesting to look at- USE YOUR HUMAN IMAGINATION and GO CRAZY!
- Having problems coming up with scenery, where is place you love to visit or would love to travel to in the future? You could combine the past, present, and/or the future into one scene. :)
- http://www.google.com/search?q=surreal+collages&safe=active&client=firefox-a&hs=MM6&rls=org.mozilla:en-US:official&channel=sb&source=lnms&tbm=isch&sa=X&ei=OVAsVK_UM4LygwTWh4HYDw&ved=0CAgQ_AUoAQ&biw=1143&bih=679&dpr=0.9&surl=1
- NO Silhouette Photos as seen here below.

NO SILHOUETTE PHOTOs- we need to show a variety of colors - You may use the magazines on counter by sink, or on a computer or on your phone to find images that you want to draw from to come up with your creative landscape design in your sketchbook so you are prepared and know where everything goes. Yes, you will eventually be given 18"x12" drawing paper to do the actual project so it is fair to everyone to have to do the same size project.
- Your sketchbook is the ideal and perfect spot for brainstorming ideas but copy paper will have to work if you don't have your s.b.
- Your Creative Landscape should not just be nature- you must also show the presence of man- structures-houses, barns, and buildings, bridges, windmills, statues, cars, planes, etc.
- You should have a very obvious foreground, middleground, and background such as the one below here with the gold fish. In the foreground it has a large tree flower and grass, in the middleground it has a house and a gold fish and more trees in the distance, and then in the background there are blue fish and sky and clouds and underwater.

- Step 2: You must get your design sketches approved by me first before you get good, larger-size 18"x12" drawing paper from turn in station table and scissors, magazines, glue, etc.
- Step 3: You will cut (no tearing for this project- craftsmanship counts a bunch guys) out from different photos from magazines.
- Make sure if you go off the edges of the paper that you cut those clippings off to be neat.
- All magazine cuttings/clippings should be COMPLETELY glued down. No edges or corners sticking up.
- Every bit of the original 18"x12" paper should be completely covered, no empty white spaces/holes.
- Keep your cuttings/scraps in your journal binder, we unfortunately don't have bags for this for 162 students.
- CLEAN UP YOUR TABLE/FLOOR AREA! MESSES AFFECT GRADES FOR SURE -don't put up too early or it'll hurt your grade.
- "About Me Website Green Screen Self-Portrait" Assignment due September 23rd

- Either using your phone, your actual camera, or one of the two red cameras, take a brand new, fresh, RIGHT NOW in the moment self-portrait and put it on your "about me" page on your blogspot.
- Requirements:
- DO NOT LOOK AT THE CAMERA or you will redo it
- Your ENTIRE body must be in the photo so you can fully interact with the surroundings. To interact means that you need to imagine/pretend that there is another environment behind you and that your pose you make fits in with this new surrounding.
- Look at these examples here, Tyler B. from 1st period and Jade B. from 7th took both of the images for this assignment: Tyler's one of the bench on the ARHS nature trail, and the other with the self-timer on his camera on the green screen and Jade on the green screen with the duck and then added the super deluxe internet-found great resolution lake mountain image.

Tyler B. used the green screen to combine 2 images - Use the self-timer on your camera or phone so it's in sharp focus with good lighting
- Use the green screen (no shoes on the green screen) so later you can delete the green in the background and put whatever image you want there.
- Each person needs to keep their time for this at the green screen at 5 minutes or under. So, know your idea of your pose for interacting with the green screen before it's your turn up there. When finished copy and paste the link from your actual live website of your "about me" page and send it to your class period on Edmodo.
- We will edit these in Photoshop soon to change the background so start searching for your background image either in your own photos or online. Make sure you get a very high quality image for the background or it will be poor resolution and blurry.
- To search for large quality images in your browser: type what you want in Google, then click on "images", then "search tools" then "size" and then finally "large"
- To save the image, make sure you actually click on "view image" off to the right of the photo and then right click on the actual large image, click save image and make sure you save it on your flash drive or on the computer desktop and then upload it to your Google Drive.
- To upload files to your Google drive: click on your "apps" in Google, then "Drive" then click on the red upload arrow and click on the file you want to upload.
- You should back up all projects and assignments on your Google Drive in case you lose your flash drive or SD card.
- "Magical Hidden-Image Value Drawing Project" due this Monday, Sept. 29th, uploaded to your "artwork" page with a title to get a grade with a title in quotation marks.

- 1. You will first need to search through Google or Bing Images or from magazines if there are no computers available and find a PHOTOGRAPH of some interesting subject matter: animal, person, insect, car, etc.
- Once you have chosen your subject matter, run quick like a cheetah to my record player white board gray and turquoise podium,tm and write down your name and subject on your period's subject list so no one else in your period can do your subject for this project.
- Remember, you are an interesting human being and can pick a subject to create an artwork. (Think about your interest or hobbies, or maybe your favorite animal, etc.)

- You may make up your own from your imagination instead of drawing from a photograph as long as you don't draw from someone else's art. (Think about the overall meaning of your work)
- NO TRACING FROM THE COMPUTER SCREEN OR FROM MAGAZINES!!! EVER!

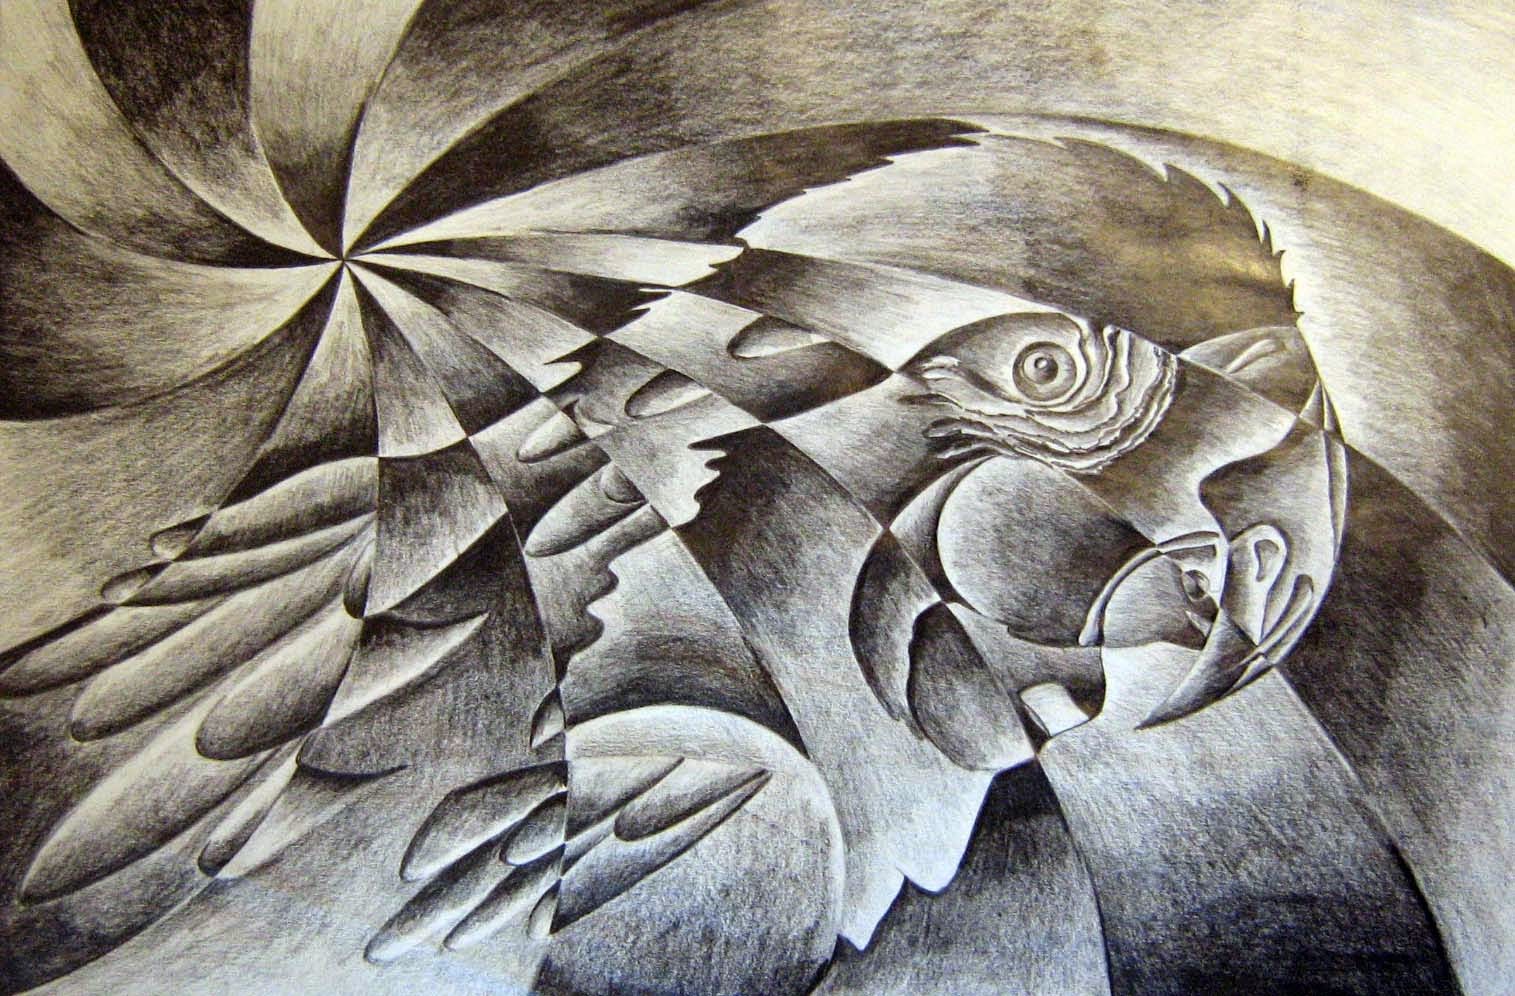
3. Then, simply divide up the entire page with a variety of lines that also go through your subject as shown in the fish image example above.
 |
| Meghan C. 2013 |
5. Shade each shape with a gray value scale from lightest to darkest and viola, you have a shattered, hidden-image drawing. NO COLORS- JUST GRAY PENCIL (get dark)
 6. At the end of class put it in your period's drawer at the turn in station and you will get it out of there everyday or keep it in your Journal Binder which is the best.
 - Japanese Notan due Wednesday, Sept. 17th at the end of class. (You will

- take a photo of it and upload it to your "artwork" page on your website and then paste the link to your artwork page from your blogspot on Edmodo and send it to YOUR class period (not me)
- First, you’ll need to come up with a theme for your Notan (i.e. forest, mountains, beach, city, space, sports, food, jungle, animals, insects, people, the really good ones like the one to the left here HAVE A SCENE of some kind)
- Draw out ideas/initial sketches in sketchbook or copy paper
- You will need to have an identifiable subject matter on each of the four sides
- Remember all shapes on any side must mirror and reflect as they "flip" and go over to the white side.
- Google, "Japanese Notans" and then click on images for references (remember, it's okay to borrow ideas from artist here and there, but you must find a way to make it your own to make your artwork ORIGINAL, that's the point of any art class.
- Do not start with cutting, etc. until your sketchbook assign. drawing DESIGN is approved by ME first.
- Then you'll need to get a piece of white drawing paper and black construction paper.
- Cut the White one, (using the paper cutter by turn in station), and cut it to 9"x9" square, that's inches people.
- Cut the Black one to 4.5"x4.5" square
- Draw out your shapes and lines on the black square
- Cut out black pieces (keep all pieces)
- Arrange pieces on your paper
- Only glue down pieces when you get them where they need to be (don’t “glue as you go”)